
Docsify 插件
效果预览
本文目录(34 节)
- 1.1 分页导航插件
- 1.2 聊天记录生成
- 1.3 Social Share 分享插件
- 1.5 文档更新时间
- 1.6 支持回到顶部
- 1.7 添加页脚
- 1.8 添加搜索功能
- 2.1 支持 DOT 语言作图
- 2.2 支持 LaTex 数学公式
- 2.3 定制评论功能
- 2.3.1 来必力评论
- 2.3.2 Gitalk 评论
- 2.3.3 Disqus 评论
- 2.3.4 Valine 评论
- 2.4 即时通讯聊天室
- 2.5 添加网站运行时间
- 2.6 实现旧域名跳转
- 4.12 右下角添加 live2d
- 4.13 访问量统计
- 4.14 阅读时间和字数统计
- 5 离线模式
- 5.1 创建 serviceWorker
- 5.2 寄存器
- 6 赞助作者
- 6.1 方案一
- 6.2 方案二
- 6.3 方案三
- 3. 美化功能
- 3.1 点击页面出现爱心
- 3.2 美化提示样式
- 4.7 复制文章弹窗提示
- 2. 不兼容插件
- 2.1 添加编辑文档按钮
- 2.2 带标题图片
1. 实用功能
1.1 分页导航插件
效果预览

1.2 聊天记录生成
使用模板
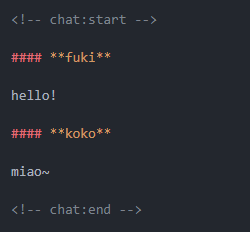
效果预览

头像在 index.html 文件设置
chat: {
    // chat panel title
    title: '聊天记录',
    // set avatar url
    users: [
    { nickname: 'fuki', avatar: 'avatar_fuki.jpeg' },
    { nickname: 'koko', avatar: 'avatar_koko.jpeg' },
    ],
}
1.3 Social Share 分享插件
经过测试,无法直接在 index.html 中嵌入代码,需要先安装下面的外链脚本插件:
<script src="//cdn.jsdelivr.net/npm/docsify/lib/plugins/external-script.min.js"></script>然后在 .md 文件中写下:
<link rel="stylesheet" href="https://cdnjs.cloudflare.com/ajax/libs/social-share.js/1.0.16/css/share.min.css">
<div class="social-share"></div>
<script type="text/javascript" src="https://cdnjs.cloudflare.com/ajax/libs/social-share.js/1.0.16/js/social-share.min.js"></script>
效果:

1.5 文档更新时间
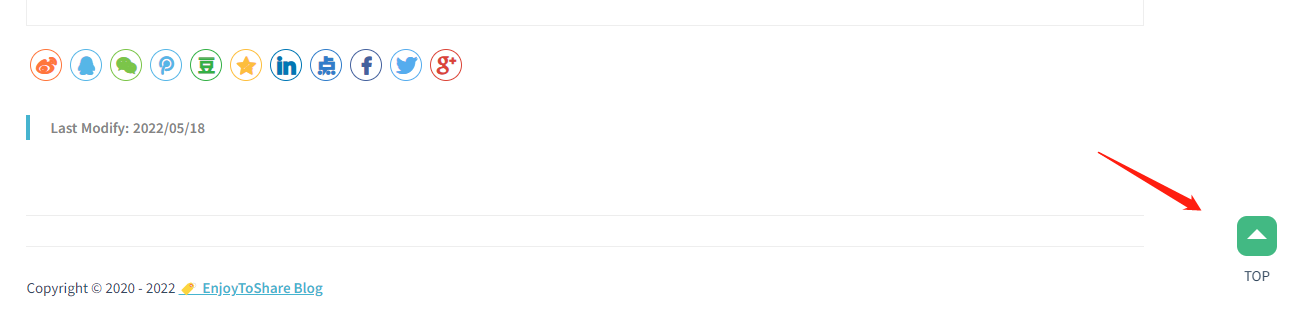
1.6 支持回到顶部
通过 jQuery 定义插件 jQuery GoUp 实现点击回到顶部功能。
操作
- 引用 jquery 库和 jquery.goup.js 到 index.html
<script src="./js/jquery.js"></script>
<script src="./js/jquery.goup.js"></script>- 调用插件
<script type="text/javascript">
        $(document).ready(function () {
        $.goup({
            trigger: 100,
            bottomOffset: 52,
            locationOffset: 25,
            // title: 'TOP',
            titleAsText: true
        });
        });
</script>- 效果
1.7 添加页脚
添加插件
<script src="//unpkg.com/docsify-footer-enh/dist/docsify-footer-enh.min.js"></script>window.$docsify中添加配置
footer: {
copy: '<span>Copyright © 2020 - 2020</span>',
auth: ' <a href="https://wugenqiang.github.io/" target="_blank">🏷️ EnjoyToShare Blog</a>',
pre: '<hr/>',
style: 'text-align: left;',
},//添加页脚效果图:

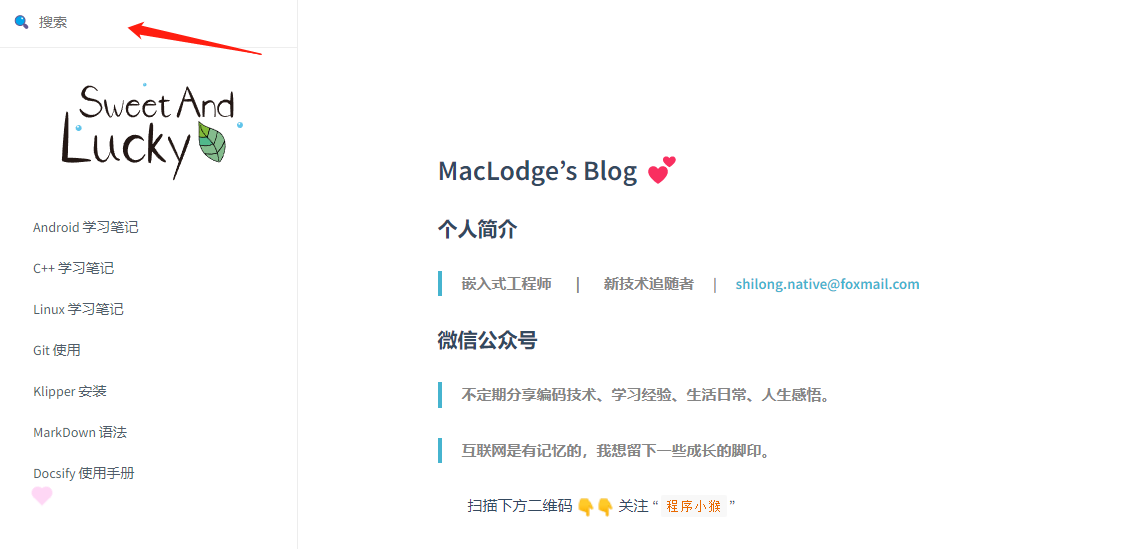
1.8 添加搜索功能
在 index.html 中添加:
<script src="https://cdn.jsdelivr.net/gh/wugenqiang/NoteBook@master/plugin/search.min.js"></script>window.$docsify中添加:
search: {
        paths: 'auto',
        placeholder: '🔍 搜索',
        noData: '😒 找不到结果',
        // Headline depth, 1 - 6
        depth: 6,
        maxAge: 86400000, // 过期时间,单位毫秒,默认一天
    },//添加搜索框
效果图:
2 定制功能
2.1 支持 DOT 语言作图
DOT 语言是贝尔实验室开发的用于作图的脚本语言,最初在桌面端程序 Graphviz 中支持。后来有人开发了 Viz.js 使得浏览器端也能支持 DOT 语言作图的渲染。
我们的目的如下:当 Markdown 渲染器识别到一处语言名为 dot 代码块时,就调用 Viz.js 渲染代码块中的语句,使它们成为 DOT 语言定义的矢量图。
具体操作如下:(以下所有操作都在 docsify 项目的 index.html 文件中进行)
- 首先,引入 Viz.js 文件,只要在 head 中添加一条语句就行:
<script src="https://cdn.jsdelivr.net/npm/viz.js@1.8.0/viz.js"></script>- 添加如下部分:
<script>
    window.$docsify = {
      markdown: {
        renderer: {
          code: function(code, lang) {
            if (lang === "dot") {
              return (
                      '<div class="viz">'+ Viz(code, "SVG")+'</div>'
              );
            }
            return this.origin.code.apply(this, arguments);
          }
        }
      }
    }
  </script>
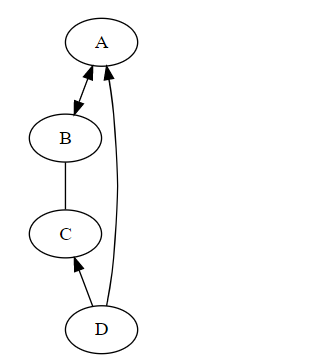
下面看看具体实现:
- 操作:
```dot
digraph demo{
A->B[dir=both];
B->C[dir=none];
C->D[dir=back];
D->A[dir=forward];
}
```- 效果图:
2.2 支持 LaTex 数学公式
LaTeX 是大门鼎鼎的文档排版软件,它对于数学公式的支持非常好。
和 DOT 语言类似,一开始也是只有桌面端程序支持,但是后来同样有人开发了各种各样的 .js 来在浏览器端进行支持。
具体操作如下:(以下所有操作都在 docsify 项目的 index.html 文件中进行)
- 引入 docsify-katex.js,head 中添加
<!-- CDN files for docsify-katex -->
<script src="//cdn.jsdelivr.net/npm/docsify-katex@latest/dist/docsify-katex.js"></script>
<!-- or <script src="//cdn.jsdelivr.net/gh/upupming/docsify-katex@latest/dist/docsify-katex.js"></script> -->
<link rel="stylesheet" href="//cdn.jsdelivr.net/npm/katex@latest/dist/katex.min.css"/>- 实际操作
$$
\left[
\begin{matrix}
 1      & 2      & \cdots & 4      \\
 7      & 6      & \cdots & 5      \\
 \vdots & \vdots & \ddots & \vdots \\
 8      & 9      & \cdots & 0      \\
\end{matrix}
\right]
$$- 效果图:
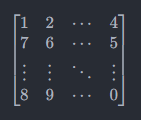
更多 Latex 矩阵样式请参考 使用 Latex 写矩阵
2.3 定制评论功能
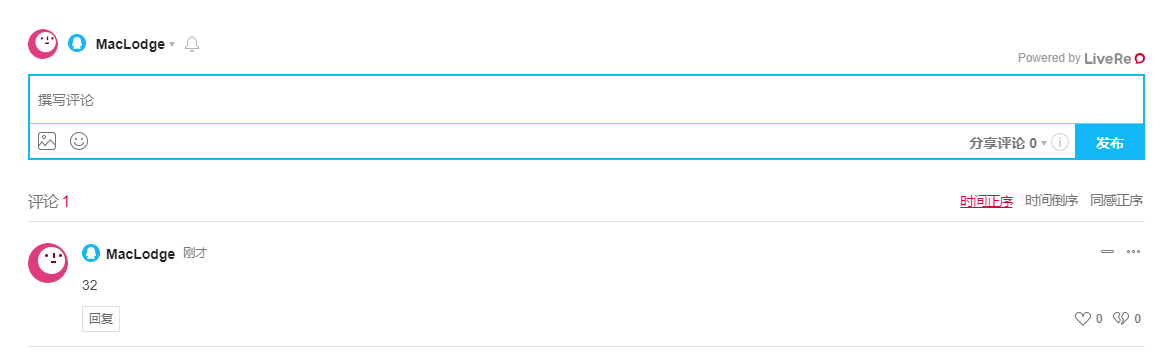
2.3.1 来必力评论
在 index.html 中 window.$docsify中添加代码:
plugins: [
        /*来必力评论*/
        function (hook, vm) {
          // load livere
          hook.beforeEach(function(content) {
            var comment = "<div id='lv-container' data-id='city' data-uid='MTAyMC80MzA4MC8xOTYyNg=='></div>\n\n----\n"
            return content + comment;
          });

          hook.doneEach(function() {
            (function(d, s) {
              var j, e = d.getElementsByTagName(s)[0];
              if (typeof LivereTower === 'function') { return; }
              j = d.createElement(s);
              j.src = 'https://cdn-city.livere.com/js/embed.dist.js';
              j.async = true;
              e.parentNode.insertBefore(j, e);
            })(document, 'script');
          });
        },
      ]
效果图:
2.3.2 Gitalk 评论
- (1)申请 Gitalk
申请网址:https://github.com/settings/applications/new
要是觉得自己填的不好或者填错了,没关系,这个后面是可以改的
注册完毕之后,会进入这个界面:
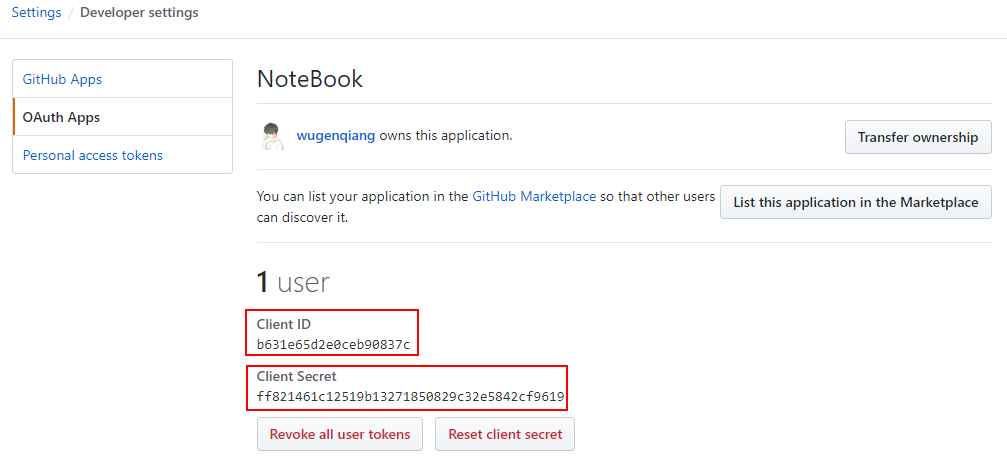
在这里,你就能看到 clientID 和 clientSecret 啦,页面不要关闭,先记录一下这两个值,下面有用。
- (2)修改 index.html
添加下面代码:(以我的举例,适当修改)
<!-- Gitalk 评论系统 -->
<link rel="stylesheet" href="https://wugenqiang.gitee.io/notebook/plugin/gitalk.css">
<!-- Gitalk 评论系统 -->
<script src="https://wugenqiang.gitee.io/notebook/plugin/gitalk.js"></script>
<script src="https://wugenqiang.gitee.io/notebook/plugin/gitalk.min.js"></script>
<script src="https://wugenqiang.gitee.io/notebook/plugin/md5.min.js"></script>
<script>
  // title_id需要初始化
  window.title_id = window.location.hash.match(/#(.*?)([?]|$)/) ? window.location.hash.match(/#(.*?)([?]|$)/)[1] : '/';
  const gitalk = new Gitalk({
    clientID: 'b631e65d2e0ceb90837c',
    clientSecret: 'ff821461c12519b13271850829c32e5842cf9619',
    repo: 'NoteBook',
    owner: 'wugenqiang',
    admin: ['wugenqiang'],
    title: decodeURI(window.title_id),
    distractionFreeMode: false,	// 是否添加全屏遮罩
    id: md5(window.location.hash),	// 页面的唯一标识,gitalk 会根据这个标识自动创建的issue的标签,我们使用页面的相对路径作为标识
    enableHotKey: true,	// 提交评论快捷键(cmd/ctrl + enter)
  })
  // 监听URL中hash的变化,如果发现换了一个MD文件,那么刷新页面,解决整个网站使用一个gitalk评论issues的问题。
  window.onhashchange = function (event) {
    if (event.newURL.split('?')[0] !== event.oldURL.split('?')[0]) {
      location.reload()
    }
  }
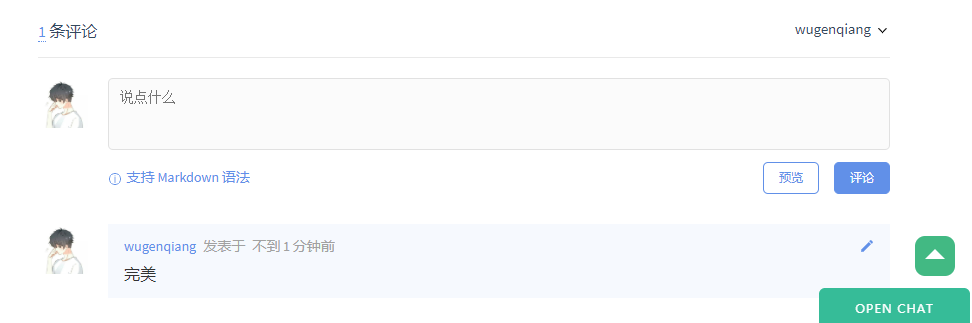
</script>- (3)效果图:
2.3.3 Disqus 评论
在 index.html 中添加:
<script>
  window.$docsify = {
    disqus: 'shortname'
  }
</script>
<script src="//cdn.jsdelivr.net/npm/docsify/lib/plugins/disqus.min.js"></script>
效果图:

2.3.4 Valine 评论
第一步:获取APP_ID和APP_Key
单击此处注册或登录leancloud。
单击此处创建新应用程序Leancloud,您将获得APP ID/ APP Key。
具体使用可参考:https://wugenqiang.github.io/articles/Hexo-NexT-Valine.html 以及官网 https://valine.js.org
第二步:在 index.html 中添加:
<body>
    ...
    <script>
        window.$docsify = {
          // docsify-valine (defaults)
          Valine: {
              appId: '<APP_ID>',
              appKey: '<APP_Key>',
              avatar: 'monsterid',
              path: window.location.href,
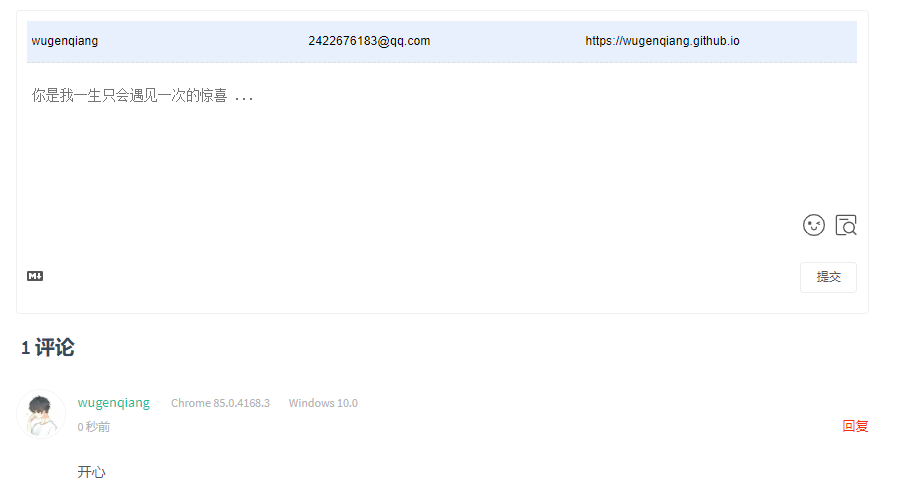
              placeholder: "你是我一生只会遇见一次的惊喜 ...",
          }
        }
    </script>
    ...
    <script src='//unpkg.com/valine/dist/Valine.min.js'></script>
    <script src="//unpkg.com/docsify-valine/dist/docsify-valine.min.js"></script>
</body>
效果:
优化界面显示:
效果如下:

css 代码如下:
<style>
    /* Valine 评论样式 */
    #veditor {
      background-image: url(https://gitee.com/wugenqiang/PictureBed/raw/master/NoteBook/20200704172531.webp);
      background-size: contain;
      background-repeat: no-repeat;
      background-position: right;
      background-color: rgba(255, 255, 255, 0);
      resize: vertical
    }

    .v .vsubmit.vbtn {
      color: #fff;
      background: #49B1F5;
    }
    .vat {
      color: #49B1F5 !important;
      font-size: 14px !important;
    }
    .vcopy.txt-right {
      display: none;
    }
    .v .at {
      color: #7bc549 !important;
      font-size: 14px !important;
    }

    /*鼠标放在头像上头像旋转 start*/
    img.vimg {
      transition: all 1s   /* 旋转时间为 1s */
    }

    img.vimg:hover {
      transform: rotate(360deg);
      -webkit-transform: rotate(360deg);
      -moz-transform: rotate(360deg);
      -o-transform: rotate(360deg);
      -ms-transform: rotate(360deg);
    }
    /*鼠标放在头像上头像旋转 end*/

    /*评论卡片式背景 start*/
    #vcomments .vcards .vcard {
      padding: 15px 20px 0 20px;
      border-radius: 10px;
      margin-bottom: 15px;
      box-shadow: 0 0 4px 1px rgba(0, 0, 0, .12);
      transition: all .3s
    }

    #vcomments .vcards .vcard:hover {
      box-shadow: 0 0 8px 3px rgba(0, 0, 0, .12)
    }

    #vcomments .vcards .vcard .vh .vcard {
      border: none;
      box-shadow: none;
    }
    /*评论卡片式背景 end*/

    #vcomments .vcards .vcard .vh .vhead .vnick {
      font-size: 15px !important;
      color: #f3a109 !important;
      font-weight: bold !important;
    }

    #vcomments .vcards .vcard .vh .vhead .vsys {
      border-style:solid;
      border-color: #7ec152;
      border-width:0.3px;
    }

    #vcomments .vpanel .vwrap {
      border-radius: 10px;
      box-shadow: 0 0 4px 1px rgba(0, 0, 0, .12);
    }
  </style>
2.4 即时通讯聊天室
具体配置细节可参考我写过的什么是Gitter?
2.5 添加网站运行时间
在 index.html 页面中写入:
<!-- 访问量统计 -->
<script async src="//busuanzi.ibruce.info/busuanzi/2.3/busuanzi.pure.mini.js"></script>

<!-- 运行时间统计 -->
<script language=javascript>
  function siteTime() {
    window.setTimeout("siteTime()", 1000);
    var seconds = 1000;
    var minutes = seconds * 60;
    var hours = minutes * 60;
    var days = hours * 24;
    var years = days * 365;
    var today = new Date();
    var todayYear = today.getFullYear();
    var todayMonth = today.getMonth() + 1;
    var todayDate = today.getDate();
    var todayHour = today.getHours();
    var todayMinute = today.getMinutes();
    var todaySecond = today.getSeconds();
    /* Date.UTC() -- 返回date对象距世界标准时间(UTC)1970年1月1日午夜之间的毫秒数(时间戳)
    year - 作为date对象的年份,为4位年份值
    month - 0-11之间的整数,做为date对象的月份
    day - 1-31之间的整数,做为date对象的天数
    hours - 0(午夜24点)-23之间的整数,做为date对象的小时数
    minutes - 0-59之间的整数,做为date对象的分钟数
    seconds - 0-59之间的整数,做为date对象的秒数
    microseconds - 0-999之间的整数,做为date对象的毫秒数 */
    var t1 = Date.UTC(2020, 02, 10, 00, 00, 00); //北京时间2020-02-10 00:00:00
    var t2 = Date.UTC(todayYear, todayMonth, todayDate, todayHour, todayMinute, todaySecond);
    var diff = t2 - t1;
    var diffYears = Math.floor(diff / years);
    var diffDays = Math.floor((diff / days) - diffYears * 365);
    var diffHours = Math.floor((diff - (diffYears * 365 + diffDays) * days) / hours);
    var diffMinutes = Math.floor((diff - (diffYears * 365 + diffDays) * days - diffHours * hours) / minutes);
    var diffSeconds = Math.floor((diff - (diffYears * 365 + diffDays) * days - diffHours * hours - diffMinutes * minutes) / seconds);
    if (diffYears > 0)
        document.getElementById("sitetime").innerHTML = " 本站已安全运行 " + diffYears + " 年 " + diffDays + " 天 " + diffHours + " 小时 " + diffMinutes + " 分 " + diffSeconds + " 秒 ";
    else
        document.getElementById("sitetime").innerHTML = " 本站已安全运行 " + diffDays + " 天 " + diffHours + " 小时 " + diffMinutes + " 分 " + diffSeconds + " 秒 ";
  }
  siteTime();
</script>
然后嵌入代码:
<span id="sitetime"></span>如果想嵌入在页脚部分,可以如下设置:
footer: {
copy: '<center><span id="sitetime"></span><br/><span>Copyright © 2022 - 至今 </span>',
auth: ' <a href="https://echoheim.github.io/" target="_blank"> 🏷️ EnjoyToShare Blog </a>',
pre: '<hr/>',
style: 'text-align: left;',
},//添加页脚2.6 实现旧域名跳转
在 index.html 页面中写入:
<!-- 旧域名跳转 -->
<script>
    if (location.host != "notebook.js.org") {
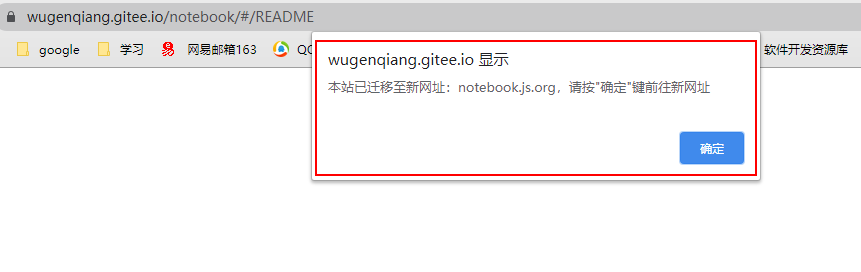
        alert("本网站已迁移到新网址:notebook.js.org,请按确定前往新网址");
        window.location.href ="https://notebook.js.org/";
    }
</script>
效果:

当然不能让测试的地址出现跳转啊,所以进行下面优化:
<!-- 旧域名跳转 -->
<script>
    if (location.host != "notebook.js.org" && location.host != "127.0.0.1:3000") {
        alert('本站已迁移至新网址:notebook.js.org,请按"确定"键前往新网址');
        window.location.href ="https://notebook.js.org/";
    }
</script>
效果:
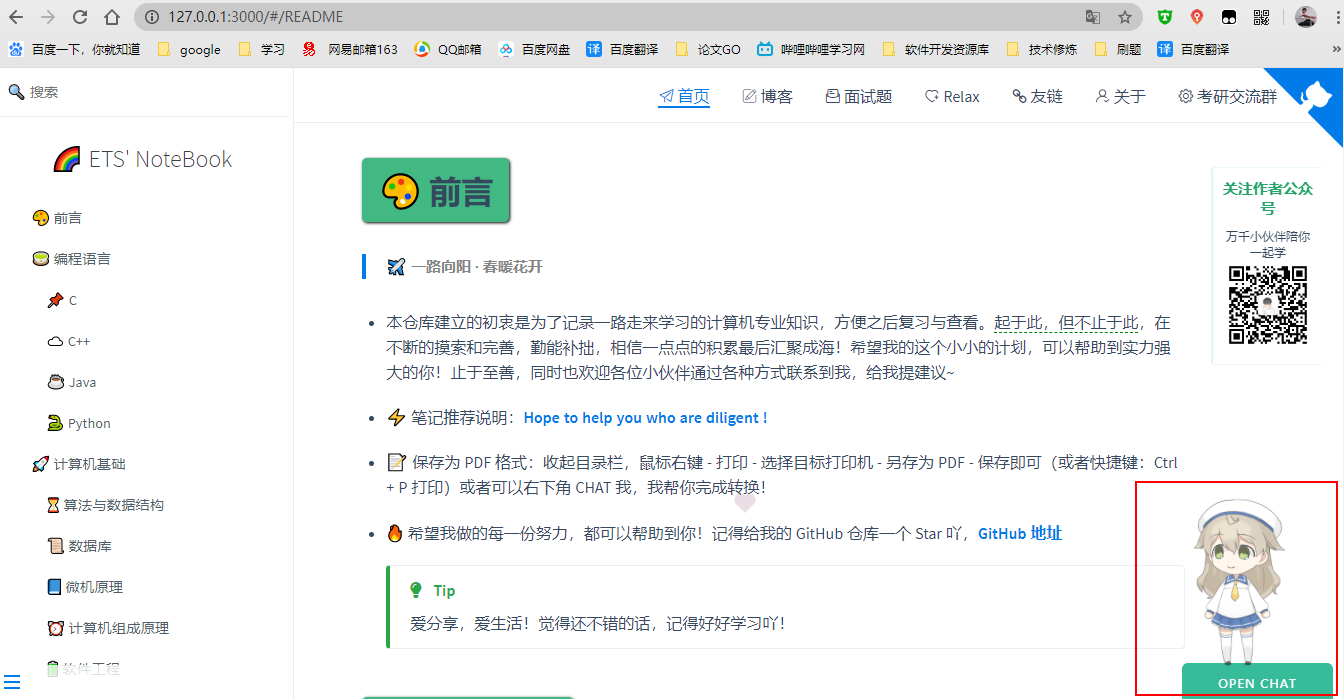
4.12 右下角添加 live2d
效果图:
在 index.html 中添加:
<script src="https://eqcn.ajz.miesnfu.com/wp-content/plugins/wp-3d-pony/live2dw/lib/L2Dwidget.min.js"></script>
<script>
  L2Dwidget.init({
    "model": {
      //jsonpath控制显示那个小萝莉模型,
      //(切换模型需要改动)
      jsonPath: "https://unpkg.com/live2d-widget-model-koharu@1.0.5/assets/koharu.model.json",
      "scale": 1
    },
    "display": {
      "position": "right", //看板娘的显示位置
      "width": 70,  //小萝莉的宽度
      "height": 140, //小萝莉的高度
      "hOffset": 35,
      "vOffset": -20
    },
    "mobile": {
      "show": true,
      "scale": 0.5
    },
    "react": {
      "opacityDefault": 0.7,
      "opacityOnHover": 0.2
    }
  });
</script>
即可。
当然你可以通过修改模型切换显示不同的小萝莉,以下是模型列表:
通过替换上面 jsonPath 中的 路径来修改小萝莉,例如使用 live2d-widget-model-nipsilon,替换成以下内容
jsonPath: "https://unpkg.com/live2d-widget-model-nipsilon@1.0.5/assets/nipsilon.model.json"
替换的小萝莉效果可以参考这里,点我(引用下大佬的链接,笔芯)
- live2d-widget-model-chitose
- live2d-widget-model-epsilon2_1
- live2d-widget-model-gf
- live2d-widget-model-haru/01 (use npm install –save live2d-widget-model-haru)
- live2d-widget-model-haru/02 (use npm install –save live2d-widget-model-haru)
- live2d-widget-model-haruto
- live2d-widget-model-hibiki
- live2d-widget-model-hijiki
- live2d-widget-model-izumi
- live2d-widget-model-koharu
- live2d-widget-model-miku
- live2d-widget-model-ni-j
- live2d-widget-model-nico
- live2d-widget-model-nietzsche
- live2d-widget-model-nipsilon
- live2d-widget-model-nito
- live2d-widget-model-shizuku
- live2d-widget-model-tororo
- live2d-widget-model-tsumiki
- live2d-widget-model-unitychan
- live2d-widget-model-wanko
- live2d-widget-model-z16
!> 另一个更强大一些,有 7 个模型,直接那旁边的按钮就可以切换,但是切换有点慢(第一个模型有 70+ 的衣服,其他模型没试)
如果想体验这种动态效果,仅仅需要在 index.html 中添加下面语句即可:
<script src="https://cdn.jsdelivr.net/gh/stevenjoezhang/live2d-widget/autoload.js"></script>4.13 访问量统计
在 index.html 中添加:
<!-- 访问量统计 -->
<script async src="//busuanzi.ibruce.info/busuanzi/2.3/busuanzi.pure.mini.js"></script>
在想添加的 md 文件中添加:
<br>
<span id="busuanzi_container_site_pv" style='display:none'>
👀 本站总访问量:<span id="busuanzi_value_site_pv"></span> 次
</span>
<span id="busuanzi_container_site_uv" style='display:none'>
| 🚴♂️ 本站总访客数:<span id="busuanzi_value_site_uv"></span> 人
</span>
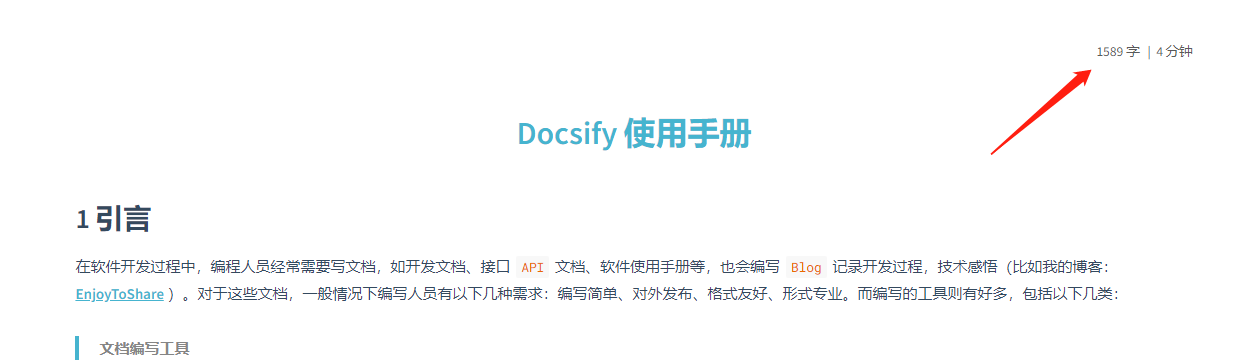
<br>4.14 阅读时间和字数统计
效果图:
- 实现
<!-- 阅读时间和字数统计 -->
<script src="//unpkg.com/docsify-count/dist/countable.js"></script>window.$docsify中添加配置
// 字数统计;
count:{
    countable:true,
    fontsize:'0.9em',
    color:'rgb(90,90,90)',
    language:'chinese'
},
5 离线模式
渐进式 Web 应用程序(PWA)是将最好的网络与最好的应用程序结合在一起的体验。我们可以与服务人员一起增强我们的网站,以使其脱机工作或使用低质量的网络。
5.1 创建 serviceWorker
在文档根目录中创建一个文件:pwa.js,然后复制以下代码:
/* ===========================================================
 * docsify pwa.js
 * ===========================================================
 * Copyright 2016 @huxpro
 * Licensed under Apache 2.0
 * Register service worker.
 * ========================================================== */

const RUNTIME = 'docsify'
const HOSTNAME_WHITELIST = [
  self.location.hostname,
  'fonts.gstatic.com',
  'fonts.googleapis.com',
  'cdn.jsdelivr.net'
]

// The Util Function to hack URLs of intercepted requests
const getFixedUrl = (req) => {
  var now = Date.now()
  var url = new URL(req.url)

  // 1. fixed http URL
  // Just keep syncing with location.protocol
  // fetch(httpURL) belongs to active mixed content.
  // And fetch(httpRequest) is not supported yet.
  url.protocol = self.location.protocol

  // 2. add query for caching-busting.
  // Github Pages served with Cache-Control: max-age=600
  // max-age on mutable content is error-prone, with SW life of bugs can even extend.
  // Until cache mode of Fetch API landed, we have to workaround cache-busting with query string.
  // Cache-Control-Bug: https://bugs.chromium.org/p/chromium/issues/detail?id=453190
  if (url.hostname === self.location.hostname) {
    url.search += (url.search ? '&' : '?') + 'cache-bust=' + now
  }
  return url.href
}

/**
 *  @Lifecycle Activate
 *  New one activated when old isnt being used.
 *
 *  waitUntil(): activating ====> activated
 */
self.addEventListener('activate', event => {
  event.waitUntil(self.clients.claim())
})

/**
 *  @Functional Fetch
 *  All network requests are being intercepted here.
 *
 *  void respondWith(Promise<Response> r)
 */
self.addEventListener('fetch', event => {
  // Skip some of cross-origin requests, like those for Google Analytics.
  if (HOSTNAME_WHITELIST.indexOf(new URL(event.request.url).hostname) > -1) {
    // Stale-while-revalidate
    // similar to HTTP's stale-while-revalidate: https://www.mnot.net/blog/2007/12/12/stale
    // Upgrade from Jake's to Surma's: https://gist.github.com/surma/eb441223daaedf880801ad80006389f1
    const cached = caches.match(event.request)
    const fixedUrl = getFixedUrl(event.request)
    const fetched = fetch(fixedUrl, { cache: 'no-store' })
    const fetchedCopy = fetched.then(resp => resp.clone())

    // Call respondWith() with whatever we get first.
    // If the fetch fails (e.g disconnected), wait for the cache.
    // If there’s nothing in cache, wait for the fetch.
    // If neither yields a response, return offline pages.
    event.respondWith(
      Promise.race([fetched.catch(_ => cached), cached])
        .then(resp => resp || fetched)
        .catch(_ => { /* eat any errors */ })
    )

    // Update the cache with the version we fetched (only for ok status)
    event.waitUntil(
      Promise.all([fetchedCopy, caches.open(RUNTIME)])
        .then(([response, cache]) => response.ok && cache.put(event.request, response))
        .catch(_ => { /* eat any errors */ })
    )
  }
})
5.2 寄存器
现在,在 index.html 中添加下面代码。由于它仅在某些现代浏览器上有效,因此我们需要判断:
  <!-- 实现离线化 -->
  <script>
    if (typeof navigator.serviceWorker !== 'undefined') {
      navigator.serviceWorker.register('pwa.js')
    }
  </script>
发布您的网站并开始体验神奇的离线功能。👻您可以关闭Wi-Fi并刷新当前站点以进行体验。
6 赞助作者
6.1 方案一
在文末写入:
<div ><img src="https://wugenqiang.gitee.io/notebook/images/pay/wechat-pay.png" width="200" height="200" /></div>效果图:

6.2 方案二
在 index.html 中插件中添加代码:
plugins: [
        function (hook) {
          /*添加打赏模块*/
          hook.beforeEach(function (html) {
            return html
                    + '<h2> 🎅 赞赏作者 </h2>'
                    + '如果觉得文章有帮助, 可以打赏作者哟 ❤️\n'
                    + '<iframe src="https://wugenqiang.js.org/sponsor/" style="overflow-x:hidden;overflow-y:hidden; border:0xp none #fff; min-height:240px; width:100%;"  frameborder="0" scrolling="no"></iframe>'
          });
        }
      ]
效果图:
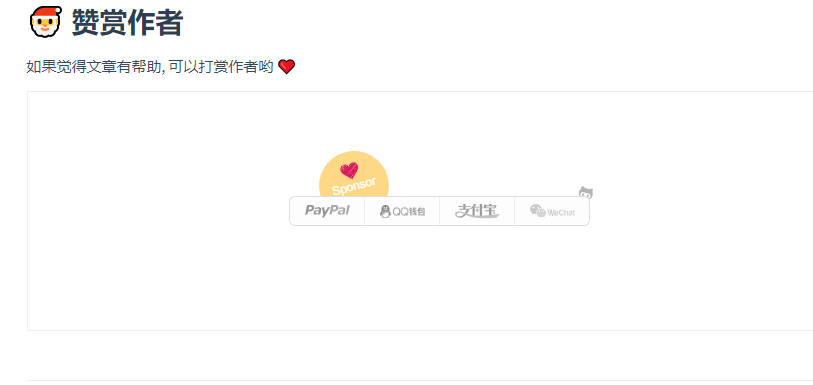
支付图片设置成自己的,可以 fork 我的仓库进行修改使用:点击 fork
6.3 方案三
跟 artitalk 大佬学的一招:
捐赠
如果觉得本项目对你有帮助,或者是单纯的想鼓励我,欢迎打赏~谢谢你的支持
| 支付宝 | 微信 |
|---|---|
 |
 |
3. 美化功能
3.1 点击页面出现爱心
在 index.html 中添加下面代码:
<!-- mouse click -->
<script src="//cdn.jsdelivr.net/gh/jerryc127/butterfly_cdn@2.1.0/js/click_heart.js"></script>
3.2 美化提示样式
效果图:
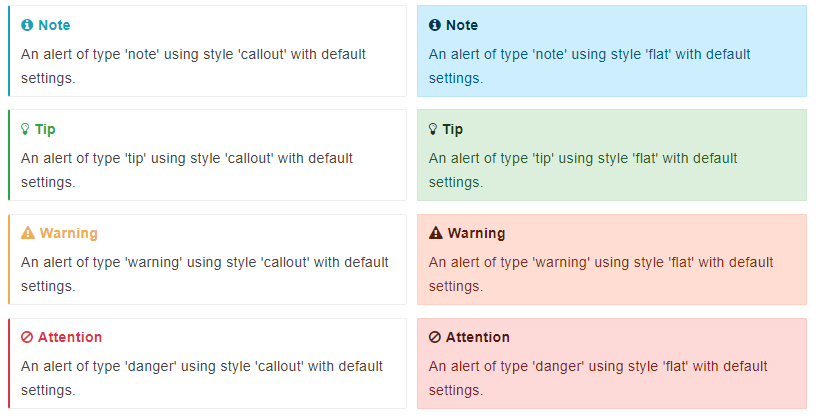
在 index.html 页面中写入:
<!-- Latest -->
<script src="https://unpkg.com/docsify-plugin-flexible-alerts"></script>
默认情况下,样式 flat 和 callout(默认值:callout)和类型 NOTE,TIP,WARNING 和 DANGER 支持。在类型和标题之间使用以下映射:
| Type | Heading |
|---|---|
| NOTE | Note |
| TIP | Tip |
| WARNING | Warning |
| DANGER | Attention |
如果想效果是这样:

可以在 index.html 页面中添加:
<script>
  window.$docsify = {
    'flexible-alerts': {
      style: 'flat'
    }
  };
</script>
本人习惯这样的格式,所以选择默认:

(3)使用示例:
- 示例一:
> [!NOTE]
> An alert of type 'note' using global style 'callout'.
效果:

- 示例二:
> [!TIP]
> An alert of type 'tip' using global style 'callout'.
效果:

- 示例三:
> [!WARNING]
> An alert of type 'warning' using global style 'callout'.
效果:

- 示例四:
> [!DANGER]
> An alert of type 'danger' using global style 'callout'.
效果:

- 示例五:
> [!NOTE|style:flat]
> An alert of type 'note' using alert specific style 'flat' which overrides global style 'callout'.
效果:

- 示例六:
> [!TIP|style:flat|label:My own heading|iconVisibility:hidden]
> An alert of type 'tip' using alert specific style 'flat' which overrides global style 'callout'.
> In addition, this alert uses an own heading and hides specific icon.
效果:

(4)使用自定义类型 COMMENT
<script>
  window.$docsify = {
    'flexible-alerts': {
      comment: {
        label: "Comment",

        // localization
        label: {
          '/en-GB/': 'Comment',
          '/': 'Kommentar'
        },

        // Assuming that we use Font Awesome
        icon: "fas fa-comment",
        className: "info"
      }
    }
  };
</script>- 示例:
> [!COMMENT]
> An alert of type 'comment' using style 'callout' with default settings.
效果:

4.7 复制文章弹窗提示
在 index.html 中写入:
<!-- alert 样式 -->
<link rel="stylesheet" href="https://cdn.bootcss.com/sweetalert/1.1.3/sweetalert.min.css" type='text/css' media='all' />

<!-- 复制提醒 -->
<script src="https://cdn.bootcss.com/sweetalert/1.1.3/sweetalert.min.js"></script>
<script>
  document.body.oncopy = function () {
    swal("复制成功 🎉",
            "若要转载或引用请务必保留原文链接,并申明来源。如果你觉得本仓库不错,那就来 GitHub 给个 Star 吧 😊   - by 吴跟强",
            "success"); };
</script>
效果图:

2. 不兼容插件
这里的插件经过测试,可以单独使用,但是和其他插件共同使用不生效,可自行尝试
2.1 添加编辑文档按钮
- 操作如下:在 index.html 文件里添加:
<script>
    window.$docsify = {
      formatUpdated: '{YYYY}/{MM}/{DD} {HH}:{mm}',
      plugins: [
        function(hook, vm) {
          hook.beforeEach(function (html) {
            var url = 'https://github.com/wugenqiang/CS-Notes/tree/master/' + vm.route.file
              var editHtml = '[📝 EDIT DOCUMENT](' + url + ')\n'
              var editHtml_end = '[🖊 Edit Document](' + url + ')\n'
              return editHtml
                   + html
                   + '\n----\n'
                   + '> Last Modified {docsify-updated} '
                   + editHtml_end
          })
        }
      ],
    }
</script>- 注意:记得代码
'> Last Modified {docsify-updated}'中的括号和字母之间没有空格!! formatUpdated字段为更新时间格式,若不加这一字段,则{docsify-updated}字段内容不显示
2.2 带标题图片
使用
效果

本文可自由转载与修改,但需保留作者署名与出处链接,不得用于商业用途,且衍生作品需以相同方式共享。 转载请注明:MacLodge's Blog · Docsify 插件